Showing posts with label Silhouette Cameo. Show all posts

Monday, December 17, 2012

What Do You Do with Digital Scrapbook Pages?

I had a great question the other day from somebody who is new to digital scrapbooking. She wanted to know what I do with my designs once they are done.

I generally do one of three things with my digital pages. The first is I wait til the end of the year and I collect pages that have to do with everything we have done this year as a family, vacations, school, weekend whatever I have scraped that relates to the current year and I have a book made of them. Many times I go back and add extra journaling because I want to write to my daughter about the year and what I felt about this year of her life. I love to see the books lined up on her book shelf and it's fun to so back and see what we did that year. The books are so light compared to my huge, heavy traditional scrapbooks and I find them much more likely to be enjoyed and I use them as a reference to help me remember what year things happened.

When you want to have a book made there are many options, I think it generally has to do with personal preference and what styles are available. A couple of the most popular that I've tried are Shutterfly and Snapfish. I preferred the quality of Shutterfly. This is a great time of year to order books many sites offer substantial savings. For anyone looking to see the options compared, I've found a review of many here  the books are geared towards photographers and others but, this will give you a very through comparison.

The second option for me is a create a hybrid page. There are many examples here on my blog and I've gone back and created a hybrid label so you can see examples. A few of my all time favorite pages are included in this category. When I create a hybrid page I print out the background I've created using Photoshop and I print it out in either a 12 x 12 size or 8 1/2 x 11 size, I work in both formats. Next I print the papers and elements I use on Epson paper and I print my photos on Epson photo paper. You can see all the products on the Favorite Things tab on my blog the link is here. I'm going to add the photo books to this list in the next couple of days.


The last things I do with my pages has more to do with the fact that I'm married to a very "techie" guy. I have a product called Apple TV that plays photos and music with cool effects. But is basically a slideshow and I love to share my pages this way my family gets together over the holidays and I show my year in review slide show and everyone gets to see anything they missed holidays, special events, new photos and scrapbook pages. There are companies that are user friendly like iPhoto for mac users or Windows Movie Makers which allow you to play them on your TV,  iPhone, iPad or similar. They can be uploaded to YouTube or similar and I really enjoy seeing my pages like this and I highly recommending giving this a try! You can see one I made here.

If you'd like to subscribe to my Youtube channel click more info and there is a link to subscribe I'm planning a few videos so stay informed! 


Today is also Monday and I have some new layouts from Lori Whitlock to share.
Her files are available from her website or Jessica Sprague through Echo Park Paper.

These two page layouts are perfect for the center page of your photo books.


I created these with the new templetes that Lori is making in both .psd format and .svg format which is great news for Silhouette users.
Thanks for visiting and if you have any suggestions on what you like to do with your digital scrapbook pages please leave them in the comments!

Tuesday, December 4, 2012

Should I buy a Silhouette Cameo? YES!

I woke up to some very exciting news this morning a new digital store has opened!


No, I'm not affiliated with them in anyway. But I do love my Silhouette Cameo and I do love more options from more designers. Especially great companies like Amy Tangerine, Crate Paper, Pebbles and American Crafts. Well why should Silhouette owners care if another digital store opens, great question.  You can use   any .png or .jpg file type and if you like to do scrapbook pages or cards or any other paper craft project think if it this way. In simple math terms.... it's WAY better. 

One design at the Silhouette store cost about $1 and there is never any coordinating paper even from companies like Echo Park who have tons of digital elements in the the store. 

So here it is, say you love Amy Tangerine, like I do.
You can buy a digital elements pack for around $2.99 right. That's about 1/3 the price of pre-made elements. Plus you get like 51 elements. That makes them less a dime each.


How cool is that, plus if you like to do pages and projects you can buy the coordination paper too.

So now for the paper I printer piece of paper cost like $1.75 approx. but here you get 13 for $4.00 plus there is never any waste. Now I know what you're going to say but printing and ink is expensive, I say no it's really not. 

I can fit tons of elements on a page! Probably a whole element pack and the same with paper and just a small amount of ink. Plus I only print the exact pieces I need. No waste and no buying paper I don't need just in case, so I don't have to drive back to the store. I can honestly say I haven't bought any printed paper or pre-made elements collections since I got my Cameo a year ago. I think I probably save 100's of dollars.

So If you love making paper crafts and you love to save money check but you need some help getting started check out a few on my tutorials.
Dont worry if you dont have the designer edition these kits dont have .svg files you just trace the and it super easy because a png has a transparent background so you get a perfect trace everytime. 


Well I hope this gets you started and thanks for stopping by! I'm going shopping!!
Hugs Lisa


Monday, November 19, 2012

Free Silhouette SVG's Blog Hop Lori Whitlock

Tomorrow is the big day!! 
Starting at Midnight MST Come join our 

I'm super excited because Lori has given me and each of the other creative team members our very own $10.00 gift card to give away! 
All you have to do is comment here on my blog and answer two questions, 
So I can get to know you better!

Question #1 Do you own a die cutting machine and which one is it?
Question #2 Do you use Photoshop or similar like Elements?
Feel free to let me know anything you'd like me to cover on future posts if you'd like!

 Winner will me announced here and on my Facebook page on Friday at 9:00 PM Pacific Time!
You can sign up to follow my blog here so you don't miss the winning announcement!!
 Lori will be giving away

See you back here at midnight with two new projects!!

Monday, September 24, 2012

Silhouette Studio Tutorial Using Gradient Fill

Halloween is one of my favorite times of year. I love to decorate my house and the front yard. Here's a peak at what my house looks like for Halloween over the years. We always have such a good time.

 Our latest theme!
We are very competitive with our pumpkin carving!
 That's my Dad and my DH helping get everything together!

I also like to make special foods and decorate my table for fall
Here's a look at my table for fall


This year I want to plan some special lunches for my daughter following the fall and Halloween themes so I'm planning a series of tutorials and ideas to share with you here is the first one.

Halloween Water Bottles Labels
 My DD takes a bottle everyday so I'm designing a few different one to throw in her lunch bag everyday using my silhouette Cameo to make the job super easy!.


Here is a look at the design on my mat
and here's the finished product 
They turned out really cute!!
So I did a quick Video to show you how easy, peasy these are to make!


If you'd like to learn how to import digital designs into the Silhouette Studio software you can watch my video here

I hope you enjoy! Hugs Lisa

Saturday, May 19, 2012

Silhouette Cameo Print and Cut Card

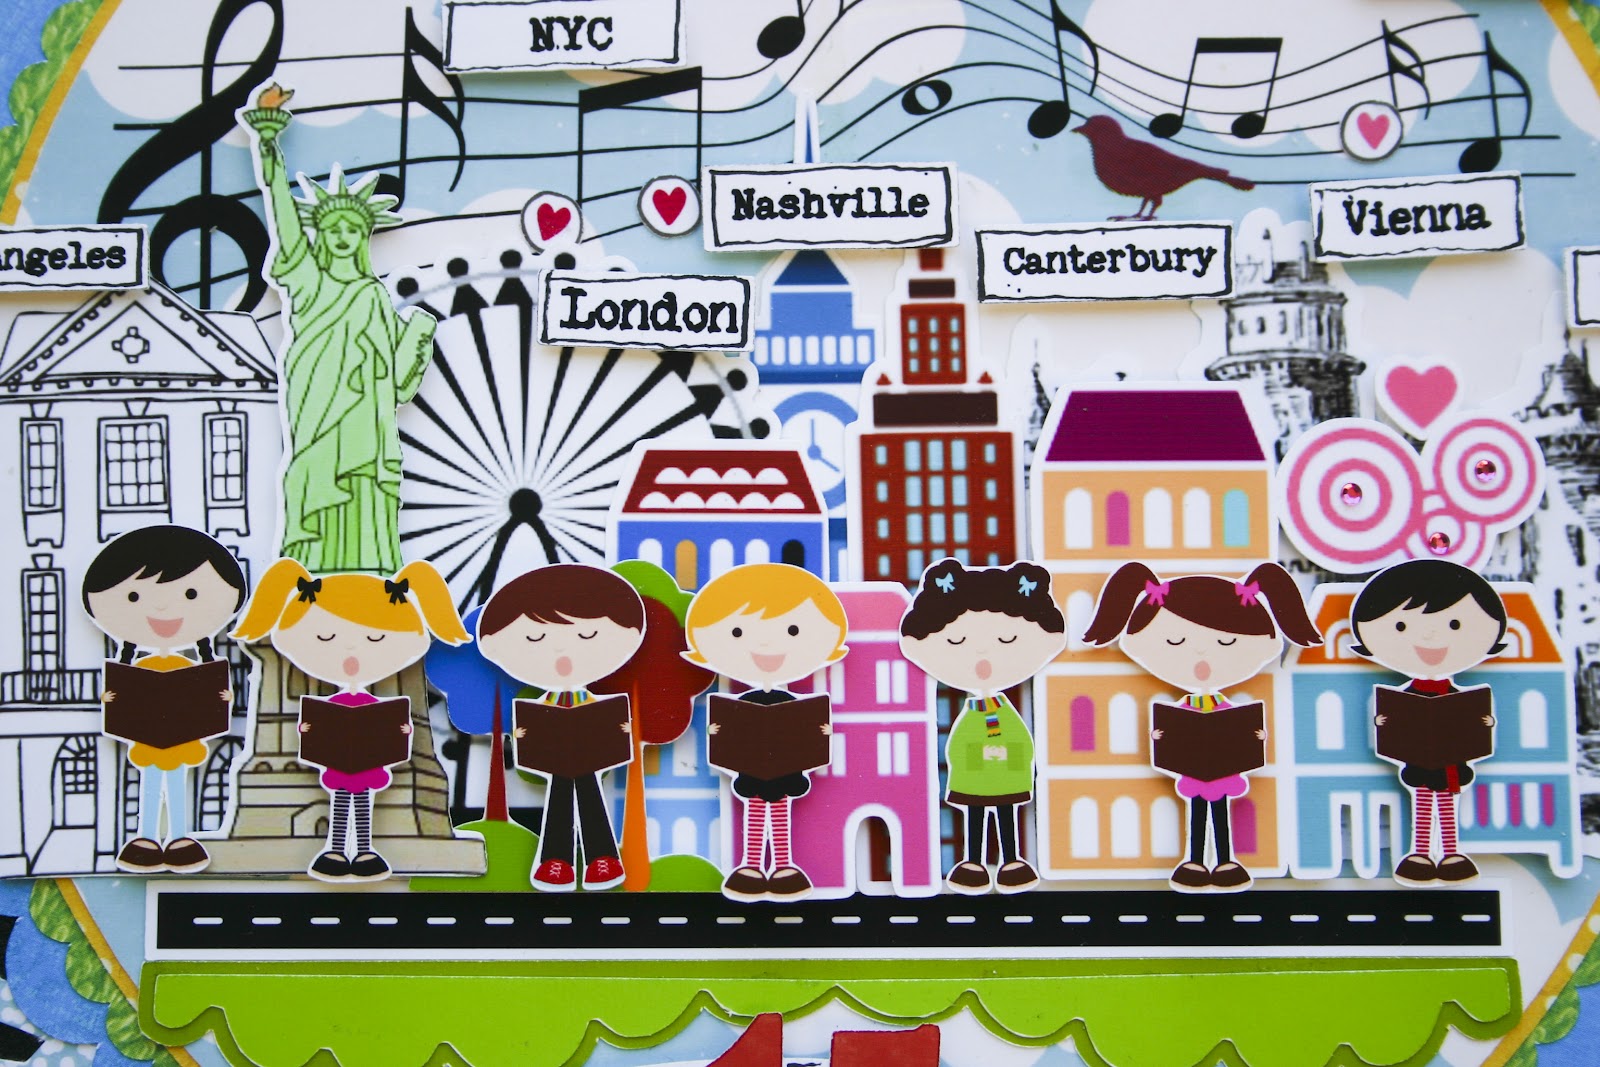
My daughter is a member of the Los Robles Children's Choir and the Artistic Director is retiring this year and tomorrow is her last performance with the group. Donna has done an amazing job working with three different choirs and she will truly be missed. I wanted to make her a special card that included the extraordinary places the choir has performed, including Carnegie Hall in NYC. The card is inspired by a design from Nayda Rocha of Brazil, I saw this project she made in January and I fell in love with it. 
I knew I wanted to do something with little singers and a little citiscape and her design came to mind, I hope I did the idea justice. Donna had always loved the handmade cards I'd given her for Christmas, so this one had to be special.


What I use to make this card
Graphic Landmarks purchased from http://graphicleftovers.com/ it's the only place I've ever found that sells graphics cheap enough, like for $1.
The little singers are digital graphics from My Graphico the item is called singing carols.
Blue cloud paper is Echo Park Digi-Hello Summer at Jessica Sprague.
they have really cute stuff and I notice this one today.... so cute!

Love this color combo!
These graphics are .png files so you don't need the designer edition to use them!!
 If you'd like to use digital graphics in your projects check out my tutorial here!
Thanks for stopping by had have a beautiful weekend!

Thursday, May 17, 2012

Silhouette Cameo: How to Fill Designs

This is a photo that I have wanted to scrap for a long time. It's my daughter holding my niece and it brings me so much happiness to see them together, because I don't get to see her very much.

 The new challenge at "Once Upon A... Sketch" was the perfect opportunity to create a page freezing this precious moment. The theme this month is Mum: I have a few special people in my life that I have a very maternal connection with and my niece is one that I wish I had.  


Here's what I used to make this page.
Basic Grey-What's Up  Paper Collection

Silhouette Store
dear_lizzy_clothesline_C00008_27175

I filled the clothes line with scanned paper from Basic Grey -What's up Collection
to learn how to do this, see my tutorial here. The video shows how to fill a font but it's the same idea. You first want to take the shape and ungroup it, it you need to ungroup it further, you can go to Options> Release compound path. This allows you to fill the shape with different patterns. For this clothesline shape I did the base in a black print and filled the little details with various prints and solid colors fills. 

Here's a look at the Sketch for this month.

Theme: Mum
We would like you to create a layout and interpret the theme "Mum" however you like based on the following sketch. You can journal as little or as much as you like, but your layout must incorporate this theme and the sketch.

Ideas for journaling: you as a mother, your role as a working/stay-at-home mum, sacrifices/benefits of being a mum, one day in your life as a mum, how your life has changed since being a mum, a tribute to your own mum, grandmother, guardian or someone you consider as close as your mum, your relationship with your mum or your daughter, one trait you have take from your mum, your desire to be a mum, your feelings on motherhood, what does it mean to be a mum?, what kind of mum do you want to be? , Mother's Day celebrations/traditions, your favorite Mother's Day gift given/receive etc..

Friday, May 11, 2012

Print and Cut designs with Silhouette Cameo

Last week for my DD's birthday we took her "Glamping" (The L.A. version of glamorous camping) really it's for us amateurs who would love to camp. but don't have the skills. 
I created this background in Photoshop and Printed it on Epson matte presentation paper size A3 which is 11.7 x 16.5. It really works out great for a 12 x 12 page and leaves a little room for some matting. just about everything on this page is printed and cut with the Silhouette Cameo. To find out how to print and cut your designs you can check out my video here.


Here's a look at the background paper.


Here's what I used to make this
Jessica Sprague- Mr Campy Paper and Elements
Sweet Shoppe Designs- Happy Camper
Lpritchett-bogo (flowers)
Designer Digitals-KPertiet Photo cluster No.34, Scratchy masks No.4, 
Touch up paint No.2, Splatters No. 3, Asst messy stitches white No.1
Designer Digitals- Lynn G Worn Page edge no.2

Thanks so much for stopping by!!


Wednesday, May 2, 2012

Silhouette Cameo and Photoshop

My daughter is turning 13 this week and I wanted to create something that would capture my feelings about my daughter turning into a teen. To me the butterflies represent the many changes she's gone through the last couple of years and I am always drawn to bright colors used with lots of black and white. Spring and Summer are loaded with great POP items especially in clothing! Here's some of the inspiration behind this page. The background is created in Photoshop and printed out. Then I cut out various elements using the Cameo so, I could pop them up off the page.


To learn how to Print and Cut scanned stamps see my tutorial here.


What I used to create this page
Designer Digitals - Watery Wings
Rhonna Farrer- Snapshot Frames 2Ps
Silhouette Library-Valentine Postmarks, Clock, Flourish, 1 piece leaf cluster, Asst gears.
Stamps I scanned

Friday, April 27, 2012

Lots of Layers Scrapbook Pages

This page is all about layers and it begins with a custom background created in Photoshop using the paint brush tool, some stamps and a few png. files. Here's a look at the background as I'm starting to put the page together.

The layout was inspired by a tutorial Emma Trout recently did for paper crafter's corner blog. I have been doing collages since high school and it's something I go back to again and again. Now with the silhouette Cameo and Photoshop it's all so much easier. I love the hunt for just the right piece, placed in just the right space to make it pleasing to my eye. And I move things around many times. I use the Silhouette Studio software to design my page as always, because everything is right at my fingertips.

What I used to create this page
Designer Digitals- Lifted Wings No.3
K Pertiet Grungy Ledger No. 3
K Pertiet In Words Brushes
K Pertiet In a Strip
Silhouette Studio- Corner Phrase
Websters Pages Digi - Road signs

Thanks so much for stopping by!

Friday, April 20, 2012

Using Digital Kits with Your Silhouette Cameo

Here is the Step by Step tutorial requested yesterday on face book. I covers everything you need to create a Scrapbook page using digital papers and elements to print and cut.
Here's how my mat showing the completed design.


Here's What I Used for this Project

Epson Heavyweight Matte Presentation Paper
Epson Artisan 1430 Wireless Wide-format Color Inkjet Printer

After everything is printed and cut arrange all the paper on a piece of background paper. I like to use something subtle like white cardstock or in this case maybe a very light pink. I like to use white paper when I'm using bright colors because it really helps the other element shine and not compete. Add the elements according to the sketch and don't be afraid to add ribbon, buttons, flowers or anything else you would normally add to a page.
If you have any questions let me know and thanks for visiting!

Thursday, April 19, 2012

A Second look at Digital Kits for Traditional Scrappers

Digital kits are not just for digital scrapper anymore. My hybrid digital designs consist of invitations, cupcake topper and banners but there is so much more to create using these images.  Of course It's no secret around here that I love Photoshop and working with digital images, but before I bought the Silhouette Cameo it was really too much work to print, resize and hand cut every little digital image I wanted to use. So I worked to build my Photoshop skills and I mainly focused on altering photos and occasional using Photoshop brushes (which are basically digital stamps). Now, I love to spend time browsing the vast amount of digital artists producing some inspiring kits loaded with goodies. I'm going to be posting some of my new favorite digital artists below. It doesn't matter if your style is clean and modern, vintage and shabby or anything in between, the digital market produces so much product and the best part is your supplies never run out, you simply print more. If you love the design but the color, size isn't right you simply change it.
Here is the traditional scrapbook page I made with all digital products and best of all, scraps.   Many people have said to me, but the cost of printing is so high. I don't want to spend money on ink, printing all those images out! I can tell you that many of these images are very small and use a tiny amount of ink. I've owned my Epson printer for three years and I've only changed the ink once!


As usual I designed this page in the Silhouette Designer Edition Software, but everything here can be done with the standard software as well. After printing and cutting all the design elements I add some dimensional touches like foam tape, ribbon and rub-ons. Plus you can add twine, buttons, rub-ons, stickers, chipboard, flowers and whatever else suits your fancy!


Here's a short video to show a couple of ways to work with digital elements!


Here's a list of some of my favorite digital designers
Lori Whitlock
Thanks for visiting!


Saturday, April 14, 2012

Video Tutorial: Silhouette Studio Designer Edition Filling a Font with Pattern


I have a new scrapbook page to share with you and this page is all about combining digital elements and Silhouette studio software. My DD is turning 13 next month and I want to capture the spirit of what is going on in her life and design pages that would appeal to her age and style. My daughter spends tons of time posting and commenting on photos with Instagram so this page really speaks to who she is and what she's into. 

What I used for this page
Amy Tangerine- Sketchbook

 I did a custom title using a TTF (font) and the fill and offset functions. Here is a quick video that show how to fill and adjust the image inside of the font. I'm using Silhouette Studio Designer Edition which allows you to scan any paper and import it into the Pattern Library.

Thanks for watching!

Friday, April 6, 2012

Silhouette Cameo Designs Easter Scrapbook Page

 I hope everyone has a wonderful Easter Weekend!
Monday the kids are back and school and I'm looking forward to having the house to myself again! 
It feel like its been a while since my last scrapbook page and I have been wanting to use the Easter paper doll I found online. This was the inspiration for this page and then it was just a mater of designing a page around the same color palette. My friends over at Once Upon a Sketch have a great sketch this month and I used it for this page. You can find the Sketch below on the page.

I designed the page entirely in the Silhouette Studio Software, I find I use it for everything these days. In fact I recently imported all my clip art, digital papers, stamps and just about everything else I design with into the program, so I have everything all in one place. This page is a perfect example of how I incorporated everything into my design. This page includes digital downloads, clip art, fonts, stamps and Silhouette Shapes. I think this is the way I always wanted my designs to be, it's just so much easier now.


Thanks so much to Webster's Pages for featuring my layout in the member's gallery this week it's always an honor!
You can view the member gallery here!
Here is how all my Print and Cuts looked before I cut them, the Silhouette of course did an amazing job cutting out every little detail. I made every embellishment myself which except for the little brass key. I added a little spring poem too.
Here are is what I used for this project
450 Quick Dry By Helmar
Silhouette Cameo Electronic Cutting Tool
Brother CS6000i Sewing Machine
The Graphics Fairy-Bunny
Silhouette Studio Store Designs
echo_park_rose_C00433_48353
echo_park_rose_C00434_48353
floral_dingbats_C00394_23067
Flourishes
Branch
Have a great weekend!
Here's the link for Once Upon a Sketch so you can join in the fun this month!

Tuesday, April 3, 2012

Silhouette: Getting to Know You Online Class REVIEW

I'm excited to share with you my experience taking Kerri Bradford's new online Silhouette Class, available at Jessica Sprague. 

The class consists of 5 videos, available all at one time and is self paced. One of the highlights for me was getting such a generous assortment of Kerri's original designs, approximately 30 in all. The quality of the recording is excellent including the picture quality and sound levels.

The class begins with a tour of the general layout of the Silhouette Studio Software. Kerri does an excellent job explaining the function of each section of the basic tools and keyboard short cuts. She makes sure to translates all her instructions to the SD model as well as the Cameo, so owners of older models will really appreciate that. The instruction in the first section is very basic and brand new owners will feel very comfortable getting to know their machine, as the title says.

After the basic tour, Kerri continues with a library tour, she includes a  review of subscription plans. In task 3, you learn to import other files and she reviews how to organize them in "your own way".
Lesson 2 covers the basics of drawing, moving and scaling designs and she encourages people to take basic shapes and combine them into new shapes and to use them creatively. She also covers align, replicate and weld tools. Lesson 3 covers among other things, the very popular text to path feature and Kerri makes it simple to understand with her easy demonstrations. She reviews altering texts in a number of different ways, including creating a bold font from a standard font. Lesson 4 covers preferences and in lesson 5 it all comes together with a nicely detailed mini book project.

I really enjoyed the class and although I am a more advanced user, I found it enjoyable to see how Kerri uses the software and how she approaches her designs and most importantly, I learned a few new things too! I highly recommend this class for any new Silhouette users and I believe many who have had their machine a while would benefit as well.
If you have any question regarding the class, please feel free to leave them in the comments and I'll post an answer for you right away!
To sign up for the class you can click here.

Monday, April 2, 2012

Silhouette Studio Designer Edition Software Tutorial: Importing Pattern Papers into My Library

I wanted to let you know I've set up a new page with links to all my Silhouette Tutorials to make it easier to find them . Just click the page tab under my blog header right next to the HOME tab. 

Today, I am spending some time organizing my Silhouette Library today and I thought I'd do a quick tutorial on importing digital pattern paper into my library. 
Whenever I design with the Silhouette Studio Designer Edition Software I like to fill my shapes and I got tired of the lack of papers to design with so, I'm adding my digital paper collections I own into my library, so they are readily available to me.
Here's how you do it!


Once the pattern is imported it can be used the same as any pattern that comes with the program including adjusting the transparency,rotation and the scale of the pattern.

You can find the Victoria Gardens paper collection I imported here at Jessica Sprague.
Here is the Christmas line Holly Jolly that I have in my library too.
To see more of my tutorial on designing with digital paper click here and here.

Sunday, April 1, 2012

Tutorial: Design Custom Silhouette Cameo Gift Tags

Just a quick video on how to make some custom gift tags using the Print and Cut feature on 
the Silhouette Cameo. Lori Whitlock designed the pretty tags and I love that she left the design layered so that the individual elements are alterable ( a sign of a true genius!)
This is available in HD, so change your setting accordingly.
The vintage image is from the Graphics Fairy and you can download the image here!
Here's what I used:
Lori Whitlock Tags -Design id #20450 from the silhouette Store


Here are the finished tags 
After I print and cut the tags I finished them 3 ways.
To finish the first tag in the center I have the printed tag with just an added ribbon for hanging. The second tag on the right, I have added a layer with a silver embossed design on vellum. And the third tag on the left, I've added a layer of cardstock  for larger gifts. 

Sunday, March 25, 2012

Video Tutorial: Silhouette Cameo Designs

I recieved so many nice comments from my last video, so thanks to everyone for saying such nice things. 
A couple of people wanted to see me design something from start to finish, so in this video I cover, welding a frame and a border, creating a compound path, editing points to alter a simple shape and a few other things. I hope you enjoy it and thanks so much for stopping by.
Here is the finished design featuring this gorgeous collection from Echo Park designed by the talented Lori Whitlock. The wood grain paper is my favorite.

 Back of card that shows the red border going all the way around.
What I used for this project

Brother CS6000i Sewing Machine

Silhouette Library shapes used
hand-drawn_scallop_border_C00253_19547
antique_doily_C00669_20509
ribbon_weave_circles_C00310_31857
flag_borders_C00561_24282  

and now the video....


Saturday, March 24, 2012

Silhouette Cameo Blog Hop

Today I'm taking part in the "Getting’ Crafty with the Cameo" blog hop. We have a great line up with some amazingly talented ladies that love to share their projects with you using their Silhouette Cameo. 
There are some amazing prices from our sponsors for this hop. You all are going to be so thrilled with the blog candy you could win. 
In order to be eligible to win the blog candy you must do the following:
 1) comment and follow each of the blogs in the hop
2) Visit the sponsors Facebook page and/or blog and comment letting them know that Scraptastical Kreations sent you from the Getting’ Crafty with the Cameo Blog hop.
Here is the list of sponsors and the prizes you can win.
Silhouette America - $10 download card
Chomas Creations – Adjustable Pen holder for the Silhouette
Jaded Blossom Stamps – Sweet Celebrations Stamp Set
Oh! My Crafts – (2) $25 GC
Cut @ Home – Silhouette Heat Transfer Kit
More Paper Than Shoes – Paper Roots Class Admission
Scrapbook Express – Silhouette Fabric Kit
Pink By Design - Stamp Set
Winners will be announced Wednesday here.

First, a little gift for you! 
I designed this Easter Shadow box just for you. So, everyone gets a prize for visiting me today.

Everything here is from the Silhouette Library and I made it easier to follow by coloring and sizing everything for you.

Here's how you make it!

1.The grid is sized at 0.33" All you need to do for the first step is draw rectangles the same size as the sample. Just count the number of squares on the grid and leave a square all the way around, that is your outside frame. Remember you will cut them out, so the colors are a guide to matching your card stock.


Suggested Paper Colors

1. After all the rectangles are complete, cut (4) sheets of your grid frame and stack them together using foam tape. Next cut the card stock inserts, if you don't like the colors I chose, please feel free to change them to anything you like. You may want to add a whole sheet on the back to hold everything in place.  
2. After all your squares are made it's time to fill them. The first square holds the Easter Basket (easter_basket_C00208_24282).
3. Next the Spring Subway Art (spring_subway_art_C01021_22157) Move it over the rectangle and pull the top and bottom arrows to fill the space completely.
4. Easter Lily Flourish (lilly_flourish_C01052_20508)
5. Chocolate Bunny (chocolate_bunny_1138)
6. Dyeing to have some fun. (dyeing_fun_phrase_C01845_17986)
7. Two Easter Eggs (3_easter_eggs_C01634_20509)
8. Happy Easter with Bunnies. 
Clouds 6_clouds_C00866_20509  1.5 x .61 and 2.75 x 1.02   
Happy Easter phrase (easter_day_title_C00229_20387) size to approx. 5.19" x 1.59"
Grass (border_woodland_grass_C00852_19210) size and layer to fill space, I used two.
Bunnies (2_bunnies__C00551_19210) each bunny is 1.8" x 2.6"
(3) Flowers- any you have are fine.
9. Tulips (bouquet_tulips_C00547_20509) and Sunday title (4_Easter_words_C00370_20509)
10. Watering Can - (garden_watering_can_C00258_20508)
11. Cross (cross_with_lillies_C01045_20508)
12. Chick baby_chick_C00866_2581 and grass baby_chick_C00866_2581 3.25" x 1.60"

And that's it! In case you're wondering why I don't have a finished picture it's because I made this for YOU. So please send me a link with your finished product, I'd love to see it!
I made one very similar last week you can find it below this post. Here is a side view of the previous one so you can see how the layers of the frame stack up.

 Now we continue with the blog hop!

 Here is the line up!

Lisa - http://lisabarrie.blogspot.com/ You are here

Thanks so much for taking the time to hop with me today! Please feel free to sign up to follow my blog, I have a new video I'm posting tomorrow!

Want to learn more, here are all my Silhouette Cameo Tutorials.