
Lets start with this adorable element I used on a recent scrapbook page. What I really like about this is the layers the frame has and the wood grain paper makes it perfection! Plus, it has a sweet flower along with the sentiment.

Here's what I used for this project

My Minds Eye Howdy Doody
"Happy Decorate" 12 x 12 paper
1. First I open my Silhouette Studio software and I go to my library to find a label shape that resembles the shaped used. I'm using 6_labels_C01078_20509 I love it 6 great shapes for .99 cents! After you open your labels on the mat (you can use any shape for this including a rectangle or circle) go ahead and click on the line of one of the labels to get the bounding box and upgroup the shapes.

Choose the one you want to use and push the others off the mat.
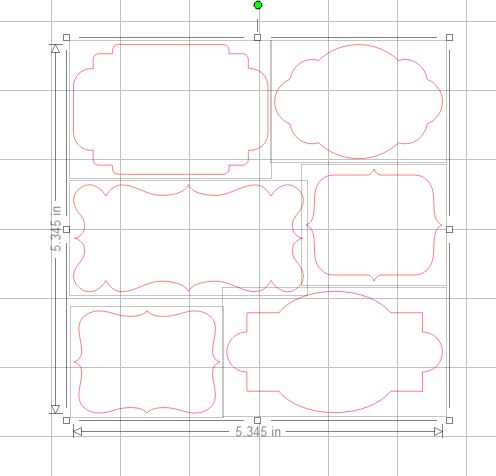
These are so cute it's hard to choose... .
2. Next, Go ahead and size it, I made mine about 2 1/2" x 3 1/2". Feel free to widen or lengthen the design by pulling the arrows, you can change the proportions to whatever you like.
3.We are going to use the offset window to create the frame. You can find the window by going to Object > Offset. Once the window is open you will select internal offset and set the offset distance to 0.300 and hit apply. The inside dimensional of the offset is about 1.8 x 2.7 (yours will vary).
4. Pull a bounding box around the shape with the offset and make two duplicate, three total. Now group two of them, leaving the third ungrouped. Next delete the off set of the third. this is what you should have. left, two frames and a base. Now I'm going to cut my two frames from "Happy Decorate" 12 x 12 paper. Use foam tape to stack the two frame together. Carefully lining them up and trim any tape that shows with a craft knife.

5. For the base cut just the shape without the offset. I used Howdy Doody "Lovely" and because I wanted the flowers to show on the side like the sample, I placed my paper on my mat, held it up to my desk lamp so I could see the grid lines on my mat behind my paper and I used those lines to help my place the shape on my cutting mat. Now I cut my base.
6. Now for the sentiment, this is the creative part you can use a stamp, sticker or rub-ons. I chose a stamp from the "Miss Caroline" Collection and since the sentiment had a frame around it, I used my craft knife to cut it out. Don't worry about cutting you clear stamps I do it all the time, and I originally saw Tim Holtz do it, so it must be O.K.
7. Stamp your sentiment on the base. Place foam tape on the bottom of your frame and lay it on top of the base and that's it!
Here's a look at my new embellishment!

Love this idea, thank you.
ReplyDeleteAnother excellent tutorial. Too bad I did not see it before I worked on my card today. I got my label done but, your way is easier. Thanks.
ReplyDeleteI saw your layout on the Silhouette blog. This card is beautiful and thanks for the tutorial.
ReplyDeleteSuch a gorgeous card Lisa!! Great tutorial as well. You are so right about the custom embellie packs.....$5 for 5 embellies!
ReplyDeleteThanks! This is a nice tut, but unfortunately I couldn't find the labels... Anyway, I'm happy with post!
ReplyDeleteThis is such a cute card and excellent tutorial! Thank you for taking time to describe your method.
ReplyDelete