
The tutorial works on any image like a PNG, SVG or JPG for example. Since I am taking an image that can not be saved in any of those formats easily, I am using a screen capture tool called snip it. (See info below) This tutorial is for users with a good basic working knowledge of photo editing. I apologize if it's over simplified. *Note: I am using the Designer Edition of Silhouette Studio.
To start you need a couple of tools, the first being a digital imaging software. For the purpose of this tutorial I'm using Photoshop, but I'm sure many of these functions are duplicated in similar programs including, Photoshop elements, etc. The next tool is a programs called snip it or any screen capture software, you can find it by doing a search for a free download or some computers have a built in version like for windows 7.
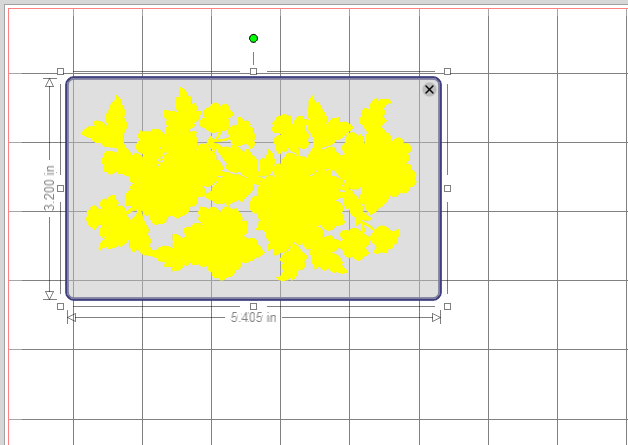
1. Open your Print and Cut image from the Silhouette library and size it as large as possible by pulling the corner anchors out diagonally. If you have the grid showing on your mat remove it by going all the way to the upper right corner of your screen to find the grid setting window go to options and unchecking the show grid box.


3. Open the image in Photoshop and use the magic wand to erase the background. The checkerboard indicates a transparent background. Don't worry about some of the red outline missing we are going to trace the image to cut it out.

4. Now the fun part! We are going to do a color adjustment by going to Image>Adjustment>Hue/Saturation. Now you have your Hue/Saturation dialogue box open and you can begin by sliding the Hue slider to the right and left to begin to make color changes to your image.

By sliding the Hue toggle to the right, I've changed the flowers to yellow!

By sliding it to the left I get Pink!

Now what if I want to change only some of the colors? I take my master setting and change that to effect groups of colors for example the reds inside the image!

Now the greens and yellows are the same and I've only changed the Reds, this way you avoid changing the foliage to brown if you want it green!

Now I can go and adjust the other colors too! Here I've adjusted the yellow channel to change the yellows and greens! Now it looks like springtime!

5. OK so I'm happy with this, now I want to save it. File>Save As>Spring.png
6. It's saved on my computer and I can open it as a png file in my SSDE software.
7. I open my Silhouette Software and go to File>Open>spring.png (** Remember where you saved it to) and it appears on my mat. Now I can trace it, print it and cut it! Note how the image has NO background because it's a PNG.!
8. The last step is to save it to your Library to use again and again File>save to library!
I hope this helps and thanks for visiting!

Thank you so much for doing this Lisa! I have Paint Shop and I am off to see if I can figure out how to make this work with that program.
ReplyDeleteGreat tutorial, Lisa! I hadn't thought of doing this with Studio print and cut files. Hurray for Photoshop!
ReplyDeleteGreat tutorial!!!Thank you so much.
ReplyDeleteLisa, you did an excellent tutorial.Thank you for taking the time to help so many.You and Photoshop rock!
ReplyDeleteWhat a nice tutorial, thank you
ReplyDelete