Friday, January 27, 2012

Tutorial: How to Change the Color of a Print and Cut Silhouette Image with Photoshop

The tutorial works on any image like a PNG, SVG or JPG for example. Since I am taking an image that can not be saved in any of those formats easily, I am using a screen capture tool called snip it. (See info below) This tutorial is for users with a good basic working knowledge of photo editing. I apologize if it's over simplified. *Note: I am using the Designer Edition of Silhouette Studio.

To start you need a couple of tools, the first being a digital imaging software. For the purpose of this tutorial I'm using Photoshop, but I'm sure many of these functions are duplicated in similar programs including, Photoshop elements, etc. The next tool is a programs called snip it or any screen capture software, you can find it by doing a search for a free download or some computers have a built in version like for windows 7.

1. Open your Print and Cut image from the Silhouette library and size it as large as possible by pulling the corner anchors out diagonally. If you have the grid showing on your mat remove it by going all the way to the upper right corner of your screen to find the grid setting window go to options and unchecking the show grid box.
 
2. Now you can capture the image with a plain white background (follow the directions for your tool and save the image as a PNG file. Here's the saved image from my computer. It has a plain white background.

3. Open the image in Photoshop and use the magic wand to erase the background. The checkerboard indicates a transparent background. Don't worry about some of the red outline missing we are going to trace the image to cut it out.

4. Now the fun part! We are going to do a color adjustment by going to Image>Adjustment>Hue/Saturation. Now you have your Hue/Saturation dialogue box open and you can begin by sliding the Hue slider to the right and left to begin to make color changes to your image.


By sliding the Hue toggle to the right, I've changed the flowers to yellow!

By sliding it to the left I get Pink!


Now what if I want to change only some of the colors? I take my master setting and change that to effect groups of colors for example the reds inside the image!

Now the greens and yellows are the same and I've only changed the Reds, this way you avoid changing the foliage to brown if you want it green!


Now I can go and adjust the other colors too! Here I've adjusted the yellow channel to change the yellows and greens! Now it looks like springtime!


5. OK so I'm happy with this, now I want to save it. File>Save As>Spring.png

6. It's saved on my computer and I can open it as a png file in my SSDE software.

7. I open my Silhouette Software and go to File>Open>spring.png (** Remember where you saved it to) and it appears on my mat. Now I can trace it, print it and cut it! Note how the image has NO background because it's a PNG.!


8. The last step is to save it to your Library to use again and again File>save to library!

I hope this helps and thanks for visiting!


Wednesday, January 25, 2012

Tutorial: How to print and cut Intricate images with the Silhouette Cameo

This method of printing and cutting stamps works for any photo, digital element (like the kind you download or save) or Photoshop brush. The files can be an SVG, JPG, PNG or ABR (digital brush), the steps are the same. *Note I am using the designer edition of Silhouette Studio.

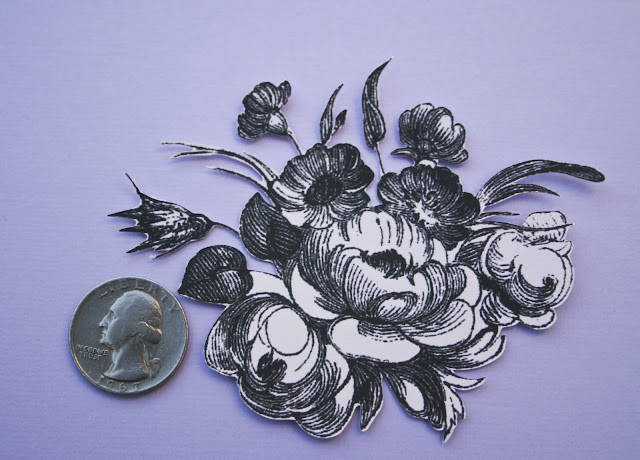
1. For this card project I've chosen a floral bouquet stamp that I printed on a piece of paper and scanned on my computer. I scanned it at 350 ppi and that is a setting you will find on your scanner. I save the file as a PNG because it has a transparent background, but you can use many other formats too. Save the file somewhere easy to find, like a folder or desk top.

2. I open the stamp onto my Silhouette mat by file >open>file name. I have created a file on my computer called digital stamps and I save all my scanned stamps in the same place. When I design a project I like to lay out all the shapes I'm going to cut, so I can see how all the layers work together. I generally cut out extra shapes because I like to a few options for later when I'm putting everything together. Before I print and cut my stamp I size it by clicking on it and grabbing the corner anchors. (If I want to recolor it, I do that in Photoshop and save it in a color). Here is my mat with shapes I want to cut along with my stamp.
3. Now that I have everything sized, I clear off my mat, so I have just the stamp. You can save the project shapes by going File> save as>new file name, that's the safest way. Now I have a saved file of the shapes and I can delete them off my mat to isolate my stamp (you can just move them off the mat too)

4. Now I trace the stamp. In this case the stamp is very intricate so after I trace it I double check the trace lines by dragging the stamp out of the way, and inspecting the edit point. Double click on the line to edit points. You can simplify the line by right clicking on a point and deleting it or moving them with the arrow keys, this allows for very fine adjustments. I like to make sure it's not cutting a line too thin or cutting into the design.


In addition I had to weld an area because the lines were so fine it traced them as separate objects. (to do that ungroup first).

5. Now I rejoin the stamp and trace lines by selecting both and going to  Object>align>align center-middle.
Next a group them, so I can move it around together. You can find the group button on the lower left corner of the screen.
6. Because the print and cut feature uses a large area for registration I like to save paper by using the smallest piece of paper I can. So I open the page tool window and manually select the paper size that best fits the image leaving enough room for registration marks. You may have to redo this step if you don't leave enough room.
Here you can take a look at the paper size and registration makes.

Everything is within the lines and I'm not wasting a lot of paper.
7. Now you can send it to the printer, print according to your printer instructions. After printing make sure all 3 registration marks are there, otherwise it won't detect them for cutting.

8. Remove from the printer and place your printed paper on your mat and proceed to cut! You can click the skip printing button since you finished that step.Make sure you loaded the mat and let the machine automatically detect registration makers.
9. cut settings- the media I chose is heavy card stock and I like to change to speed to 1 and double cut, this seems to give me the best results with intricate designs.
10. The last step is I save the design to my Library so I can use it again and again!

That's it and I'm amazed how the machine can cut such tiny details out!


Pin It


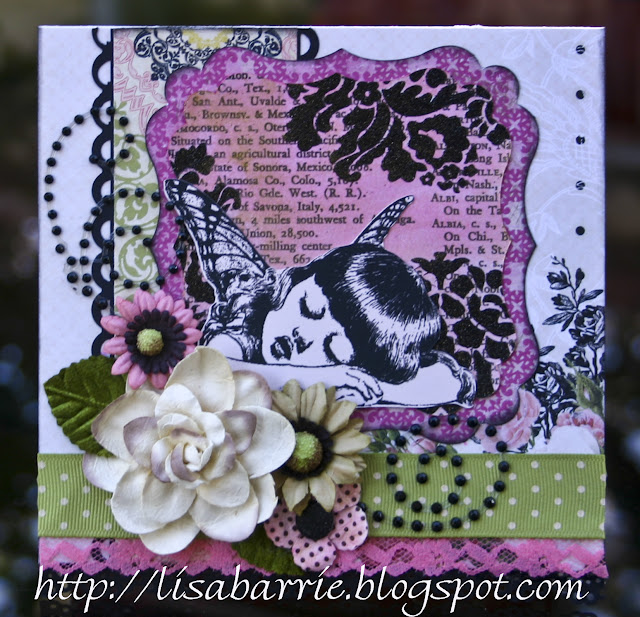
I have used the same technique on the angel for the card below.
Thanks so much for visiting!


Tuesday, January 24, 2012

Valentine Card with Silhouette Cameo

Well, this is my second Valentine's Day card and they are so much fun to make, the colors and designs available are so sweet. I fell in love with this vintage image, it is a stamp I bought on E bay recently and I stamped it, scanned it and used the print and cut feature to create the die cut. It is such a pleasure to use the Cameo with the software, this is stuff that would have been so time consuming to do before.
The rest of the shapes are from the Silhouette Library.
The pink mat is a 12x12 background shape, The black and pink mat was an offset of the same shape. It is actually glitter paper that I was able to cut on the Silhouette by placing it upside down on my sticky mat and I painted it with pink and gold Twinkling H2O's by Luminarte, it is so shimmery IRL. The black scalloped edge is from the library as well. The paper is Webster's pages, Making Memories and Crate Paper from old stash. The flowers and black flourish are Prima. The lace and ribbon are older stash too.


Pin It


Thank you so much for visiting!

Sunday, January 22, 2012

New Silhouette Cameo Girlfriend Card with Custom Photoshop Background!

Hey there! I hope you had a nice weekend.
I've got a new card to share and I had such a blast making it.
 I went a little mini crazy! I started out making this bright, spring background in Photoshop by altering a photo and layering airbrush paint, clouds, daises and doodles. Many, many layers went into making this background in Photoshop and it was inspired by Taylor Swift cards by American Greetings that came out a few years ago.
The Girl is a digital stamp by Sassy Studio Designs. They have some really cute digital stamps, she was colored in Photoshop and I used my Silhouette Cameo to print and cut her out. Next came all the details.
All the little butterflies were made with the print and cut feature.


 She has gold wire bangle bracelets, a pink flower jeweled ring, and a camo belt with a gold buckle and her jeans have a real pocket. Even her magazine is a real page from a magazine shrunk down super tiny and printed and cut with the Silhouette Cameo.

To finish her off I layered everything with pop dots and added some yellow Stickles to the center of the daisies.
Thanks so much for visiting!


Thursday, January 19, 2012

Silhouette Cameo Designer Edition vs Make the Cut software differences!

So the last couple of days I was deciding if it was worthwhile to learn yet another piece of software (SCAL2, SS, SSDE) But, ultimately I believe at this point in time there is no perfect program that does everything I want it to do. SSDE does probably 70-80%, but the things it doesn't do well are the things I really want.

So I downloaded the demo version of MTC watched a couple of quick videos and here's what i learned so far.

It started with a cute cut and print image from the library.


Great, but I wanted to take into Photoshop work a little magic and change it up.
But when I wanted to trace it, here is where the difference is. 
Here is the screen shot of SSDE
Posted Image

perfectly traced right..but I want to cut it out in 3 colors. Well, It can't be done because silhouette software has no way to differentiate the different colors or shapes ! 

Here's MTC

Posted Image

See I have 3 separate layers, each with a different color, and I can cut them all individually. See the eye symbols on the right in the layer panel, I can shut off what I don't want to cut.

So that was really cool. MTC allows you to create layers separate by color which is very effective in this case.

Tuesday, January 17, 2012

New Silhouette Cameo Print and Cut Card

apple & pear

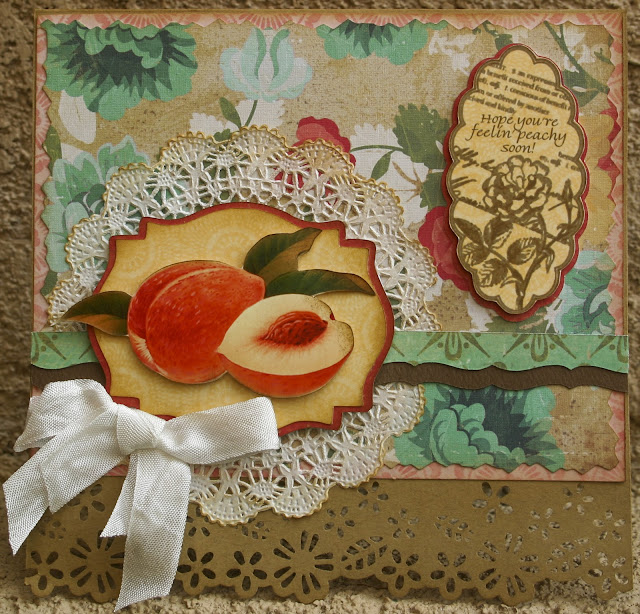
I wanted to share how I use a color inspiration to design and create a card using the Silhouette Print and Cut feature. I found this photo and as I shared yesterday I now have all my paper filed by color, so I simply chose paper that matched the tones in the inspiration photo. I really didn't care what line or 
collection they were from, the style or theme it was just getting the right tones. I loved the idea of using a piece of fruit image like on the photo and I had an image on my computer that I liked. So I used the Silhouette Print and Cut feature to create a die cut.
The next step was to hand cut the pink base. I used decorative scissors to cut the next layer (flower print) and I created a label (yellow) with an offset shadow layer (red) using a shape from the silhouette library (artisan label set by sophie gallo.) 
Using the Print and Cut feature again I took a new stamp, scanned it and created a sentiment die cut and since I scanned the stamp (and opened it in Photoshop) I was able to type my own sentiment, re-size it, and recolor it, to coordinate with the design and purpose of my card.


Pin It


Please feel free to ask me a question in my comments and I will post an answer for you.
Thanks for stopping by!

Monday, January 16, 2012

Design Inspiration + Top Picks for CHA

I've been having a great time looking at the new product sneak peeks and I wanted to share a couple of stand outs and trends with you. But before any new product comes in, I like to reorganize a bit and get rid of some old stuff . Normally I organize my paper by manufacturer and collection. But, by this time of year it's been picked over and most of it used.

So I decided to take a cue from Pinterest and Design-seed.com and re-sort all of my paper by color. Since that's really what motivates and inspires me.

I'm not on any design teams or promoting any product this is just pure inspiration!

Here are some color inspirations I've found 
From Bo Bunny's new Collection Country Garden


soda water

and
Follow your Heart by Rhonna Farrer for MME


mental vacation

For more Sneak peaks and color inspiration check out your favorite Manufacture's blogs 

Friday, January 13, 2012

Silhouette Cameo Valentine Layout with Rhonna Designs "Kiss Me"

New Layout with lots of shape from the Silhouette Library!

Have I said how much I love my Silhouette Cameo?
It just makes creating so easy, No fussy cutting here! I can take the digital elements from Rhonna's new Collection, recolor them in Photoshop and take the .png directly into my Silhouette Design Studio print and cut! HEAVEN!!

Black and white decorative artisan by SnapDragon Snippets LLC
 Photo mat square nested by Loni Harris
fence by Silhouette
3d rosette flower - scalloped by Alaa' K
Eyelet rectangle mat created by welding Decorative Border with Rectangle tool
From Rhonna Designs I used the new "Kiss Me Pieces Kits"
Prima resin pieces and flowers
Papers from Echo Park "Be Mine" and Fancy Pants "Love Story"


Close ups of  foil "LOVE" letters from MMBI (older) and Ribbon made 
 from Rhonna Designs "Kiss Me".


Monday, January 9, 2012

My First Step Card with My Silhouette Cameo!

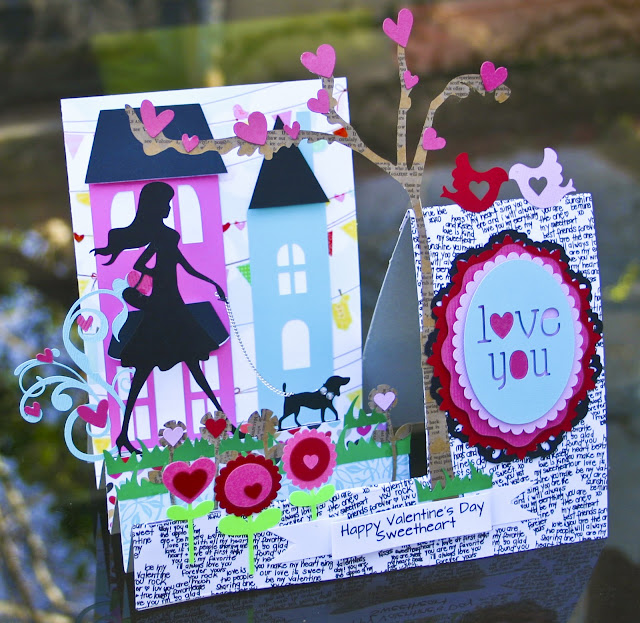
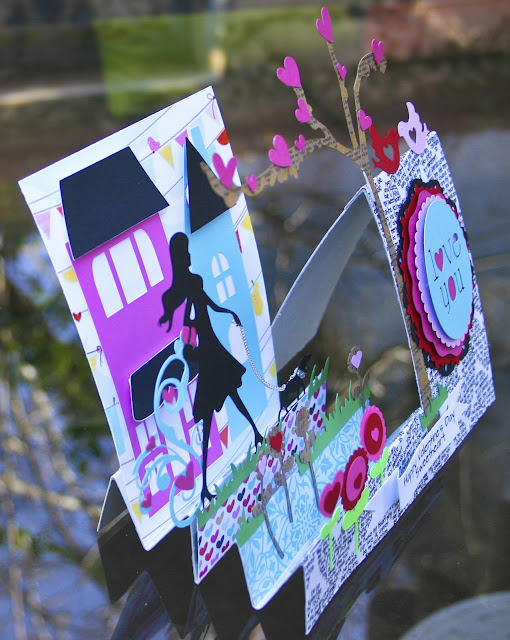
I always admire this step cards and I would have loved to have made one but, all that measuring, scoring and cutting, it just seemed like too big a pain. But now I have the Silhouette Cameo to do all of that messing, boring stuff for me. Plus the designs in the library are so CUTE, I love that whatever project I'm working on everything I need it right at my fingertips. I recently upgrades to the Designer Edition software so I can open my SVG files that I was using before with SCAL software and my Cricut.
Here are the shape I used to make this card.
little town set 2 by Jamie Koay
oval nested by Loni Harris
2 love birds by Lori Whitlock
chic girl walking dog by Jamie Koay
heart flowers by Lori Whitlock
(Grass) heart post by Loni Stevens
(Pink and Red) birds by Lori Whitlock
(Blue Flourish) flourish by Lori Whitlock
Background paper is Dear Lizzy, I scanned it and shrunk it down and printed it out.
The text hearts is Love Story by Fancy Pants.
The rest is Bazzill Cardstock, I used White Smoothie for the base (My favorite)
Text Kraft is Basic Grey Basics line (Love the stuff)


Thanks so much for stopping by!

Pin It

I've entered this project in the Moxie Fab World: Cool Tools die cut Challenge and you can check it out here http://www.moxiefabworld.com/2012/01/cool-tools-week-die-cutting-challenge.html

Friday, January 6, 2012

Featured at The Color Room!

I just want to thank all the sweet ladies at The Color Room challenge blog. I love doing challenges because I find they really spur my imagination and it's so fun to get to know new people who participate. When you get featured it's really such a nice surprise! A special thank you to Stacey Young for her sweet words!


If you'd like to play in the Color Room you can find it here!

Thursday, January 5, 2012

What can you make with a Silhouette Cameo?

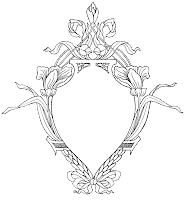
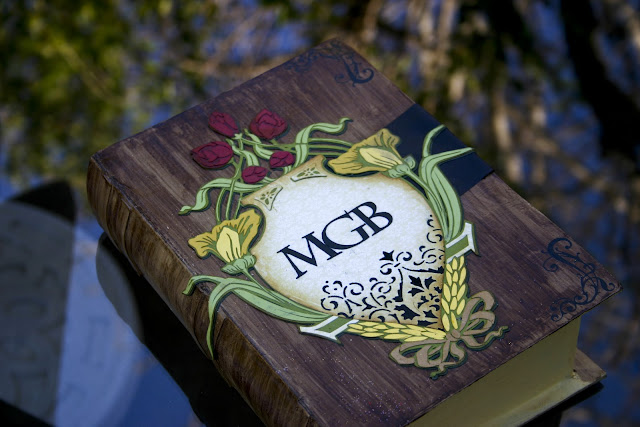
Looking at this box it may be hard to believe but it's all paper! I tend to be a bit over ambitions sometimes with my project, mainly because everything seems doable in my head. So anyhow, I wanted to make something Art Nouveau for my Dad who loves that style. I have to admit I had a little Cricut Cartridge envy when it came to the Art Nouveau Cartridge but as with all Cricut Cartridges, did I really want to spend $49.50 for a design I would probably use only once. So I looked on the internet for a traceable design and I came across this one from the Graphics Fairy
Seems harmless right, well 12 hours later, I had it figured out and started cutting!
After another 5-6 hours all the layers were cut and the assembling took another couple of hours, but all in all I think the end results are worth it. 


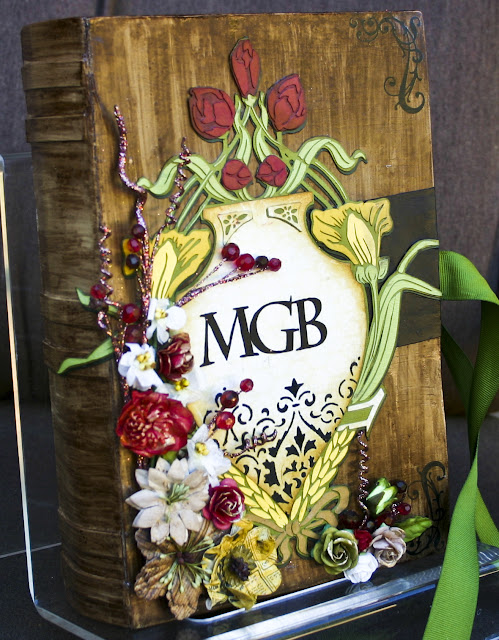
Here is my final product with all the Prima goodies added!


So if you have the time and the motivation, this is one thing you can do with the Silhouette Cameo!

Pin It

**Just wanted to answer some questions I received about this project. **
The book is a paper mache box from Joann's.  It's made by Darice and I think is was about $4.00.
I finished it with a coat of Antique Linen, Crackle Paint by Ranger. After I applied a coat of Expresso, Glimmer Glam, I used it without shaking the bottle in order to keep the glitter from getting on my box ( I mean it is for a guy after all).
Thank you so much for your comments, they really make my day!

Monday, January 2, 2012

Love Story by Fancy Pants for TCR#91

Love these fresh, modern, Valentine papers by Fancy Pants
They just seemed perfect for this design I had in mind.
Over the last couple of years I have done so  many vintage pages, but the last six months I'm so attracted to a crisper, cleaner page. Starting with a white piece of cardstock is so much fun, because everything just jumps off the page. 

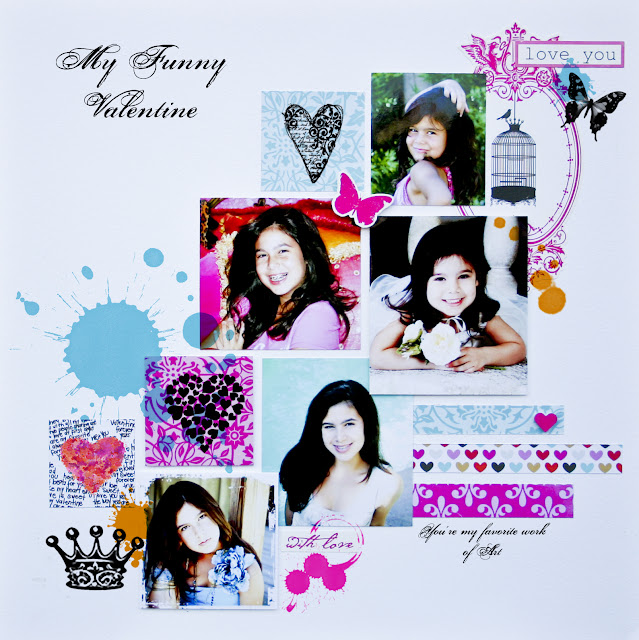
For this page I used Love Story by Fancy Pants, Be Mine Stickers by Echo Park (from last year) Asst. stamps and Ranger alcohol ink  sail blue, sunset orange, and some hot pink acrylic pant with a stamp. The font is Porcelain.

Pin It